There are three ways to search:
Free search
Here, you search as with the Google search engine: you enter one or more search terms. Possible search terms include a family name, a first name, a place name or a year.
You can also enter part of a search term by using an asterisk (*) at the beginning and/or middle and/or end of the search term. This is useful when you are not completely sure of the spelling or do not immediately get the desired search result.
The results appear in order of closest match to the search term(s). If, for instance, the search terms are ‘Roose’ and ‘Jan’, you will first get the records in which both Roose and the first names Jan, Joannes or Jean occur, then the records with only the name Roose and finally the records with the first names Jan, Joannes or Jean.
Please note that only sources to which metadata have been added (indexed) will be searched. Are you not getting any search results, even after using an asterisk (see above) or any other spelling? Try searching through the tree structure (see below).
Advanced search
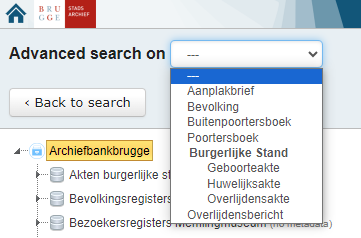
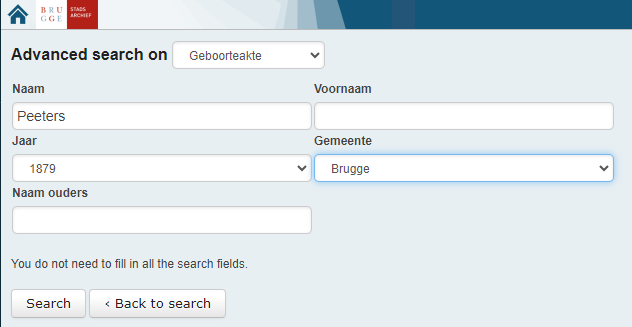
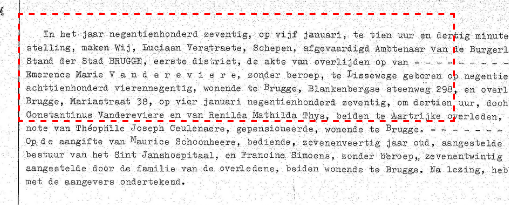
Advanced Search allows you to search more specifically within a certain source. You can choose between Civil Registers (birth, marriage or death certificates), population registers, burghers' books, posters or obituaries. Each choice has a separate search form with a number of search fields. You are not required to complete them all. See the example below:
Please note that only sources to which metadata have been added (indexed) will be searched. Are you not getting any search results, even after using a different spelling? Try searching through the tree structure (see below). You cannot use an asterisk (*) search here. This is only possible with Free Search (see above).
Tree structure
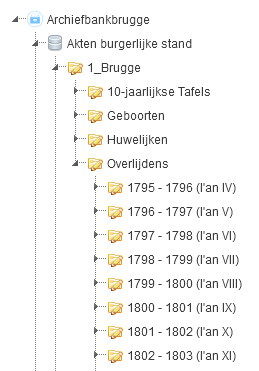
Finally, you can also browse through the range of digitalised resources. On the far left, you will find all the sources in alphabetical order. Clicking on the arrows will open a source. The same thing happens if you double-click on the name of a source. This way, you can click further and further and get to a lower level each time, until you get to the level of the images.
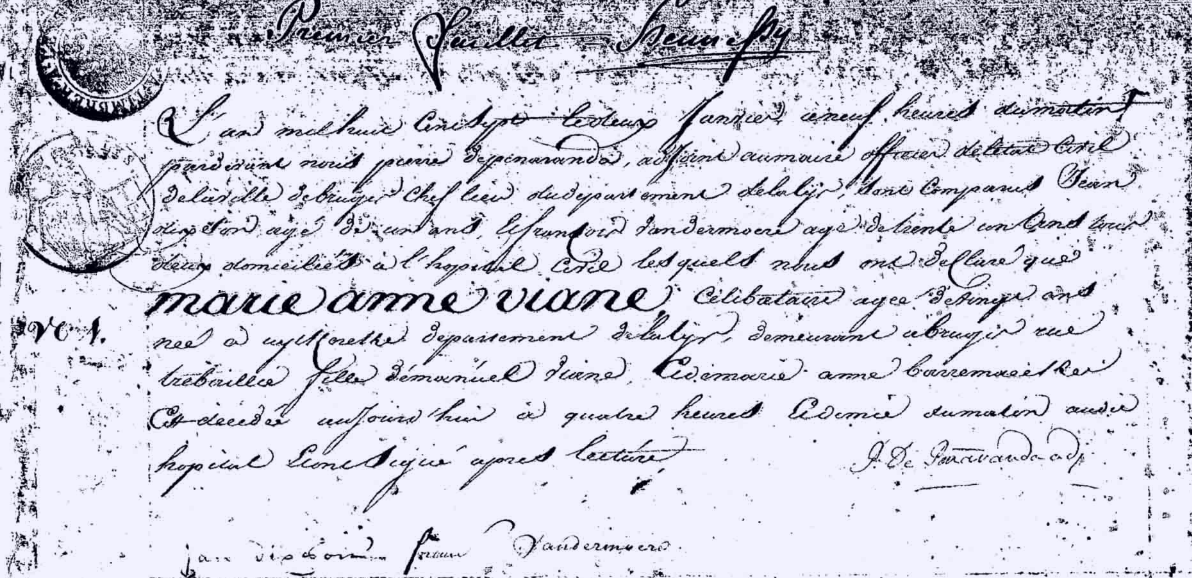
Scanned indexes have been included in the tree structure for various sources: civil registry records, population registers, Hallegeboden (historically, official announcements of regulations), municipal council minutes and parish registers. Did you have no success with Free Search or Advanced Search? Then you might just find the person or topic you are looking for through these indexes. The indexes contain references that help you further navigate the tree structure. Example: the death certificate of Justus Slembrouck (Bruges, 1933), take note of the certificate number (857) in the index. You can use this number to look up the image in the tree structure:
Consulting search results
If your search returns results, a page of search results will appear. By default, you will see up to 10 search results. This number can be adjusted: 5, 10, 20, 50 or 100.

You can also refine search results (see refining search results).
To consult a document you have found, click on the result line. Then the tree structure on the left opens and the requested document appears in the viewer, centrally on the screen. In the right-hand margin, data from this record will appear in several fields, if there is metadata.
In most cases, you will get the full document in the viewer. This does not always happen. That will be because the document is spread over several pages. If the remainder of the document is on the next page, you must click on the next image via the tree structure (left-hand margin) or go to the next page using the arrows in the top left.

On the left-hand side of the viewer, there is a scroll bar for zooming in or out. There are two more buttons below the slider: the button to select a print area yourself (more about that in the Printing section) and the button to get the image at 100 percent.
In the top right of the viewer you will find the Download, Respond, Add file to My File and Print Record icons (see below for all of these).

Refining search results
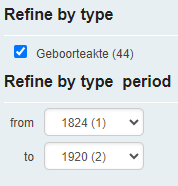
Too many search results? To the left of the search results, you can refine your search by source and/or period.
Downloading
In the top right of each image is a download button.

Click on this button and the image will be downloaded.
Printing
For the best result, you should first set out a print area. To do this, click on the button in the scroll bar.

A red box will then appear.
Place this frame over the area you want to print. This can be done by hovering over the record with your cursor. Now hold your left mouse button down and drag the frame. To make the frame larger or smaller, move your cursor over the red dotted line until you see a double white arrow. Click your left mouse button and use the double white arrow to adjust the size of the frame.
You are now ready to print. In the top right of each image is a print button.

Click this button and follow the instructions for your printer. Experience shows that you get the best print quality with a landscape A4.
Please note that sometimes a document is spread over several pages. Then you need to do it for each part! You go to the next or previous page by using the arrows in the top left corner of the image.
My files
Archiefbank Brugge offers the ability to create files, for example per family branch or per type of research. You store selected records/images there. This is useful, because it allows you to keep track of the relevant research results and they can be consulted very quickly at any time.
Creating a file
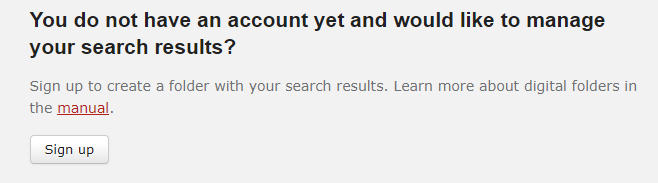
Please note: in order to create a file, you must first register on the homepage.
It is not possible to create a file in advance. You do this when you want to save a record/image to a file.
In the viewer, click on the ‘Add file to My File’ icon in the top right of the digital image.
The following window appears:
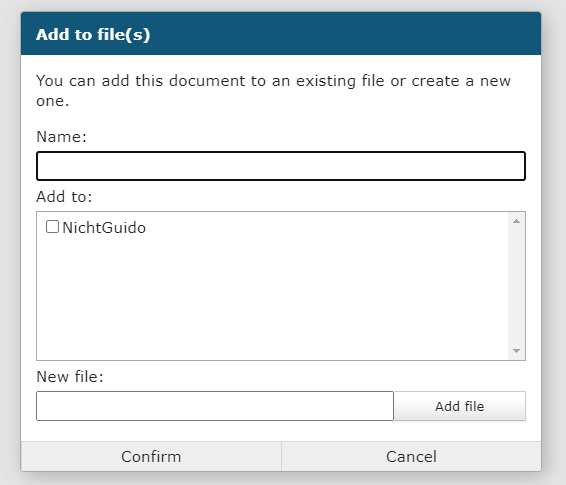
You choose what name to save the record/image as. You can also choose to add the document in question to an existing file (using Add to) or to create a new file (using New file).
Does a document consist of multiple scans? Then you need to save the various scans to have the complete document in your file.
Consulting, modifying and deleting a file
You can then view, rename and delete files. To do so, click on My Files in the menu bar at the top right.

The following window appears:
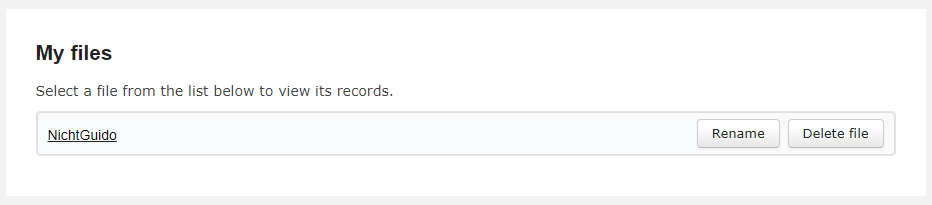
Click on the file to view it; in this example, click on NichtGuido.
Do you want to change the name or delete the dfile? Then click on one of the relevant buttons on the right.
Responding
Seen a mistake or want to add something?
In the top right of each image is a respond button.

You can also e-mail stadsarchief@brugge.be.